Tuesday, July 30, 2013

Greek Quinoa Salad {Recipe}

This summer has been a little challenging due to our schedule and the 2 littlest littles are a bit of a handful at the moment (momma-ing isn't always easy, especially when you are trying to get everyone fed). 

I try to make sure we all eat real food 90% of the time. By real food, I mean unprocessed (or minimally processed) ingredients that come from the earth. I like to think that if my great grandma didn't use it, I shouldn't either. Although I'm not sure if my great grandma ever used quinoa.

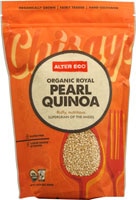
One of our favorite quick summer meals is Greek Quinoa (that's a hard word...keen-wah) Salad. Quinoa seems to be all the rage right now. It's full of all sorts of great things for your body and super tasty. I buy mine in bulk at Winco, but if your grocer doesn't carry it, you can buy it from Vitacost.


This is my go to recipe for potlucks (and family barbecue's) because it travels so well, doesn't get mushy (I individually bag the cut veggies / dressing and mix on site) and doesn't require a certain temperature to be safe (yes, I'm talking to you potato salad).

We eat this salad as our main dish by doubling it, but it makes a great side dish. I've never heard a complaint! If you are under pressure to bring something delicious and easy to an upcoming event, I challenge you to bring this!

1 Cup Quinoa (red or white)
Cucumber
Tomato or a Container of Cherry Tomatoes
Kalamata olives
Red onion
Feta Cheese
2 C ups Chicken Stock

Dressing:
1/4 Cup Lemon Juice
2 Tb Olive Oil
2 tsp Minced Garlic
1 Tb Italian Seasoning


I rarely follow the ingredient list exactly. I throw in whatever is ripe in the garden. I substitute other cheeses or green onions. It's open to whatever you have on hand. 

Cook the quinoa until tender in two cups of chicken stock in a covered pan (about 15 minutes). Dice your veggies in the  quantities you prefer - I like 1 whole cucumber and tomato, and then I eyeball everything else depending on my mood. 

Let your quinoa cool.

In a bowl, stir your veggies and cheese into the cooled quinoa.

Whisk together the dressing and toss into the salad.

How simple is that!? It tastes like summer to me. It's quick and filling and makes a great lunch for the next day after the flavors meld together. I really wish I would have taken a picture... I will have to add one. It just didn't last long enough!

I hope you'll try it and let me know what you think!

  xo- Chris

Sharing with:

I'm Partying Elsewhere {today}

Camping last weekend and getting ready to head out this weekend has sent me on a tailspin - 

 I almost forgot to let you know where I was today!

I'm guest posting over at Life As I Know It . So head on over and check it out!

xo-Chris

Tuesday, July 23, 2013

Big Plans {Little Progress}

I had big plans to get my bathroom finished by today all during naptime intervals. Anyone else do that?
 
But....
 
First I ran out of wallpaper paste.  Apparently I have gone through an entire tub...what can I say. I ran out just before putting up the last piece. Man. 
 
Then the caulk tube I had was all dried up. Dang.
 
Today, I had the perfect opportunity to go pick up these couple of things, to finish this bathroom (that is turning into a major pain in the heiny!) and my battery in my car died. Again. Lately car issues are haunting me. Rats. 
 
So, I improvised and made my own wallpaper paste and at least finished one thing. 
 
So here is a sneak peek...


And this is what I'm currently crushing on...I wonder if I changed every drawer pull to these if it would be too much? Yeah. Probably. I'm thinking these would be pretty great in this gray bathroom though...and on the boys dressers. And my dresser. Uh oh.
Brass Label Holder
 
xo-Chris


Thursday, July 18, 2013

How to make a {lovely} Boxwood Wreath: The Busy Momma's Guide

I subscribe to the theory that you can never have enough wreaths.  You may have noticed if you've browsed this little corner of the internets that I call home. It's just a thing. 

The thing is, wreaths are expensive. Like really expensive. I don't get it.  The good news: both of these wreath's cost me less than $5. So today while thinking I probably should be finishing some painting in my bathroom, I did this instead. And because you want to make one too, I made a tutorial.


I have had 2 grapevine wreaths hanging in my dining room windows for awhile. I just liked the natural and wild way about them.


  I got them at Hobby Lobby on a day that wreaths were 50% off, so they ended up being $1.99 each.  I think mine was 14 inches.

 I have several boxwood's growing in my back yard, so I just went out and cut snippets off of the brightest colored bush. If you don't have a boxwood, you could ask a friend or neighbor. If all else fails, you can buy faux boxwood greenery at Hobby Lobby and Michaels. It can be a little pricey though, so be sure to use a coupon.

Go get  your clippings. 

Push the bottom of the stem into the wreath and secure. I used a dab of hot glue on pieces that I thought were too loose, but some of them were very tight without glue.


Continue working around your wreath. I tucked small pieces in where I needed extra fluff, but I didn't want to hide the grapevine completely. You can add as much or as little as you'd like. The stems may pop out in places, so in some places I glued the tips in if they were too wild.
 

I already had the jute webbing to hang my wreath, but you could use ribbon, put it on the front door on a wreath hanger. It would be really great in a big empty frame. 


What's not to love! 


xo-Chris

Sharing with:

Wednesday, July 17, 2013

Wallpaper {Book Pages}

This has got to be one of my most favorite DIY's in a really long time. It's fast, easy and cheap. But it also really makes a statement and is a fun way to make a big impact where you need it most.


A couple of years ago I painted 3/4 of a short wall in the boys room with black chalkboard paint. It was fun and something about the big black wall anchors everything visually. Apparently I didn't really love it, because this is the only picture I can find. The wall is about 10 feet long -


You get the idea - it was just a big chalk board. On the wall. That didn't really lend anything to the room design wise. 

While I was putting together my Restoration Hardware knock-off I had a light bulb moment.

I think I started gluing pages on the wall the second I was done with the sign. I glued pages onto the wall starting at the ceiling in the corner and working my way across the wall. 

When I was finished with actually covering the wall, I randomly glued pages up to hide seams I didn't like and to sort of separate the criss cross lines the edges of the pages made. I didn't want it to look like I was trying to have perfectly aligned pages across the wall.

This is what I was left with.


I love the crinkly, curling pages! The color and texture make me happy! Squeee!

I like the way the pages meet the black - so I'm not going to trim it out right now. But that could change.


Almost finished! I've got just a few more things that need some work (remember that broken dresser drawer I was talking about?). 

I'd love to hear your comments on my book page wall!

xo-Chris


Sharing with:

Monday, July 15, 2013

Pottery Barn Black {Distressed} Finish: The Busy Momma's Guide

That's quite the long title. But don't worry, the extra time it took you to read that long title will be made up when you see what you can do to achieve the Pottery Barn black distressed finish on your own furniture.


I have painted everything. The right way, the wrong way, and every way in between. I have had the wrong way turn out great and last. And the right way chip only months later. I've learned that I don't always need all of the fancy tools, paints and whoknowswhats to achieve what I'm going for. And that's really true for every thing I do.

I've been trying to do with what I have while I do a little playing around the house this summer. It's not always easy, but it's proving to be pretty fun!

The boys have had blue beds for what seems like forever. One of the beds was purchased that way when boy#1 moved out of his crib. So it had the shiny factory finish, but was just an MDF underneath. Boy#2 then moved out of his crib into a bed (frame) I got from Craig{slist}. They were similar style beds, with finials and beadboard on the head/foot rails. But they were different. So I painted Boy#2's bed to match the already blue bed. Are you following me here?

Painting different pieces in the same color really unites them, and in this case, it was difficult to tell they were different. 

As boys things tend to do, the beds were looking pretty dinged up. So while they were away, the {busy} momma did play.

This is what I did (and what you can do too):

1. I did not prime. (Screams heard everywhere. Gasp! Mothers shielding their childrens eyes from those very words). This is what the beds looked like.


2. I used this paint. (If there is ever an apocalypse and you are in desperate need of this paint, let me know. I seem to have hoarded about 6 quarts.) Rustoleum Painters Touch in Semi Gloss Black.


3. I used this brush. It's a Wooster Angled Brush. Any good brush should do. Or, if you prefer a foam roller, that would be great. I had too many nooks and crannies for that.


4. I painted the beds. You heard me right. I just dipped and painted. No fancy footwork. This is where the Secret Service will show up on my door step to question my DIY abilities. One bed had already been painted over the factory finish so the paint had something to stick to. The other bed was left in it's original finish. If yours has been waxed or is too glossy to take a finish, you would want to gently sand and wipe down at this point. 

The paint did need two coats - I think it was because it was a semi gloss paint and those tend to need more coats in my opinion.

5. Ok-this is where you may think I have LOST. MY. MIND. (And that I need a serious RnB intervention). But I assure you, this is what gave the {fake} distressed finish that I have seen with Pottery Barn furniture. I took out my trusty tube of....drumroll.....Rub n' Buff in Grecian Gold. 


I'm sure I'm breaking every single rule known to furniture painters. But that's ok - because it turned out AMAZING! I used the RnB on my finger tip and gently ran it down all of the edges and corners that would typically be distressed. You can use less or more, whatever you like. After I wiped it on, I gently wiped it down, to get rid of the bright gold. It left a brownish tint in it's place. 

Let's get to the pictures so you can see what I did.


The finish from the Rustoleum Painters Touch paint is so smooth. You can see in the photo above how it shines. I am so tickled with how these turned out I find myself happily making their beds every morning and marveling at how easy and beautiful this project was. And...it didn't cost me a dime. I had everything already!

Can  you already see some changes I've made to the room? If you don't remember what it looked like, here it was before. Here's a sneak peak at this diy sign up on the wall.


I'm so excited with how this is turning out!

xo-Chris


Sharing with:

Saturday, July 13, 2013

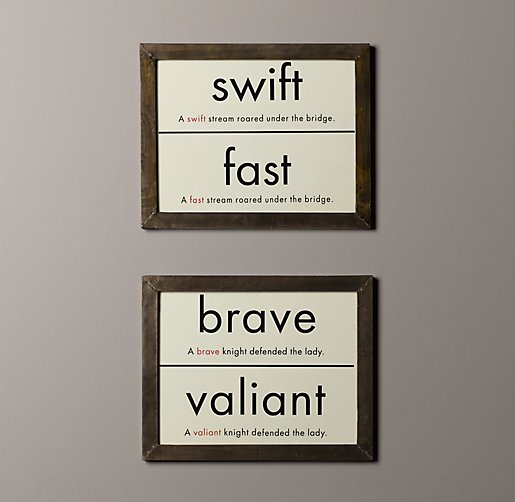
DIY Free Artwork {Restoration Hardware Inspired}

Why is it that I feel most inspired to make changes around the house when I don't have the resources to put toward changes to the house. Gah! 

So the challenge was on as I continued on my "use what I have" rule.  I am SO tickled with the way that everything turned out. I hinted at working on the boys room on Facebook (come on over and follow me!) and have mentioned the room here and here.

 The boys use the old dresser my sister and I had when we were kids. They are just plain old cheapy pine dressers - and aren't built to stand the test of time. One of the drawers finally was on it's last leg and was on the verge of making L boy craaaaazy.  While working on the dresser, I pulled the drawer out thinking of other plans for the hole. I realized the broken piece would be perfect for an art piece. 


 You're with me, right?

Here was my inspiration.


 I didn't want mine to be the same, it just gave me an idea. Those are usually my famous last words.


Using wallpaper paste and bookpages (both of which I already had), I started gluing pages to the board until it was covered.


 Then I just free handed the letters using a pencil, then went back over those lines with a sharpie.


 I filled in the lines with the sharpie because I wanted it to look sharp like a printed page, as opposed to painted.

That's all there is to that! EASY PEASY, FREE and environmentally friendly to boot! It's big too, so it makes a statement. Stay tuned because the final result is pretty awesome.

You could use anything for this - $1 foam board from the Dollar Store, cover in pages, glue a string on the back and write the word of your choice. It doesn't have to be expensive to be beautiful! 

Here's a sneak peak at what I have been working on in this room.

Oh yes I did.

xo-Chris


Sharing with: